After installing software, changing default apps, and uninstalling old versions, Windows often leaves behind invalid or obsolete registry keys—pointing to missing files, leftover uninstall records, broken Open With associations, and more. They may not crash the PC immediately, but they add noise when Windows looks up settings and can occasionally cause errors or sluggish startup.
Registry Cleaner in Windows Manager scans these suspects by category, lists them for review before deletion, and strongly recommends a backup first. Unlike blind one-click cleaners, you choose what to scan, inspect each item, add uncertain keys to exclusions, then decide what to remove.
Below: why periodic registry maintenance helps, what each part of the window does, the recommended workflow, and why a second scan after cleaning may still find entries—that is normal.
1. Why clean the registry?
- Fewer broken references. After uninstalling programs, uninstall keys, file associations, App Paths, shared DLL entries, and similar records may still point to paths that no longer exist.
- Less configuration clutter. Obsolete software entries, invalid shell extensions, and bad codec/font/sound registrations can confuse File Explorer or individual apps.
- Easier troubleshooting. Cleaning is not a cure-all, but removing clearly invalid items narrows down problems and keeps what Windows loads a bit tidier.
- Works with other tools. The left panel links to Privacy history in the registry (opens Privacy Protector); the toolbar Registry Tools button opens more registry utilities.
The registry is a core system database—only delete entries the scan found and you are sure are useless. When in doubt, back up first, use Open in Registry for context, or add the key to exclusions.
2. How to open Registry Cleaner
In the Windows Manager main window:
Cleaner → Registry Cleaner
A separate window opens. On first use, browse the scan categories on the left, uncheck any you do not want this time, then click Scan Registry.
3. Main window layout
Four main areas:
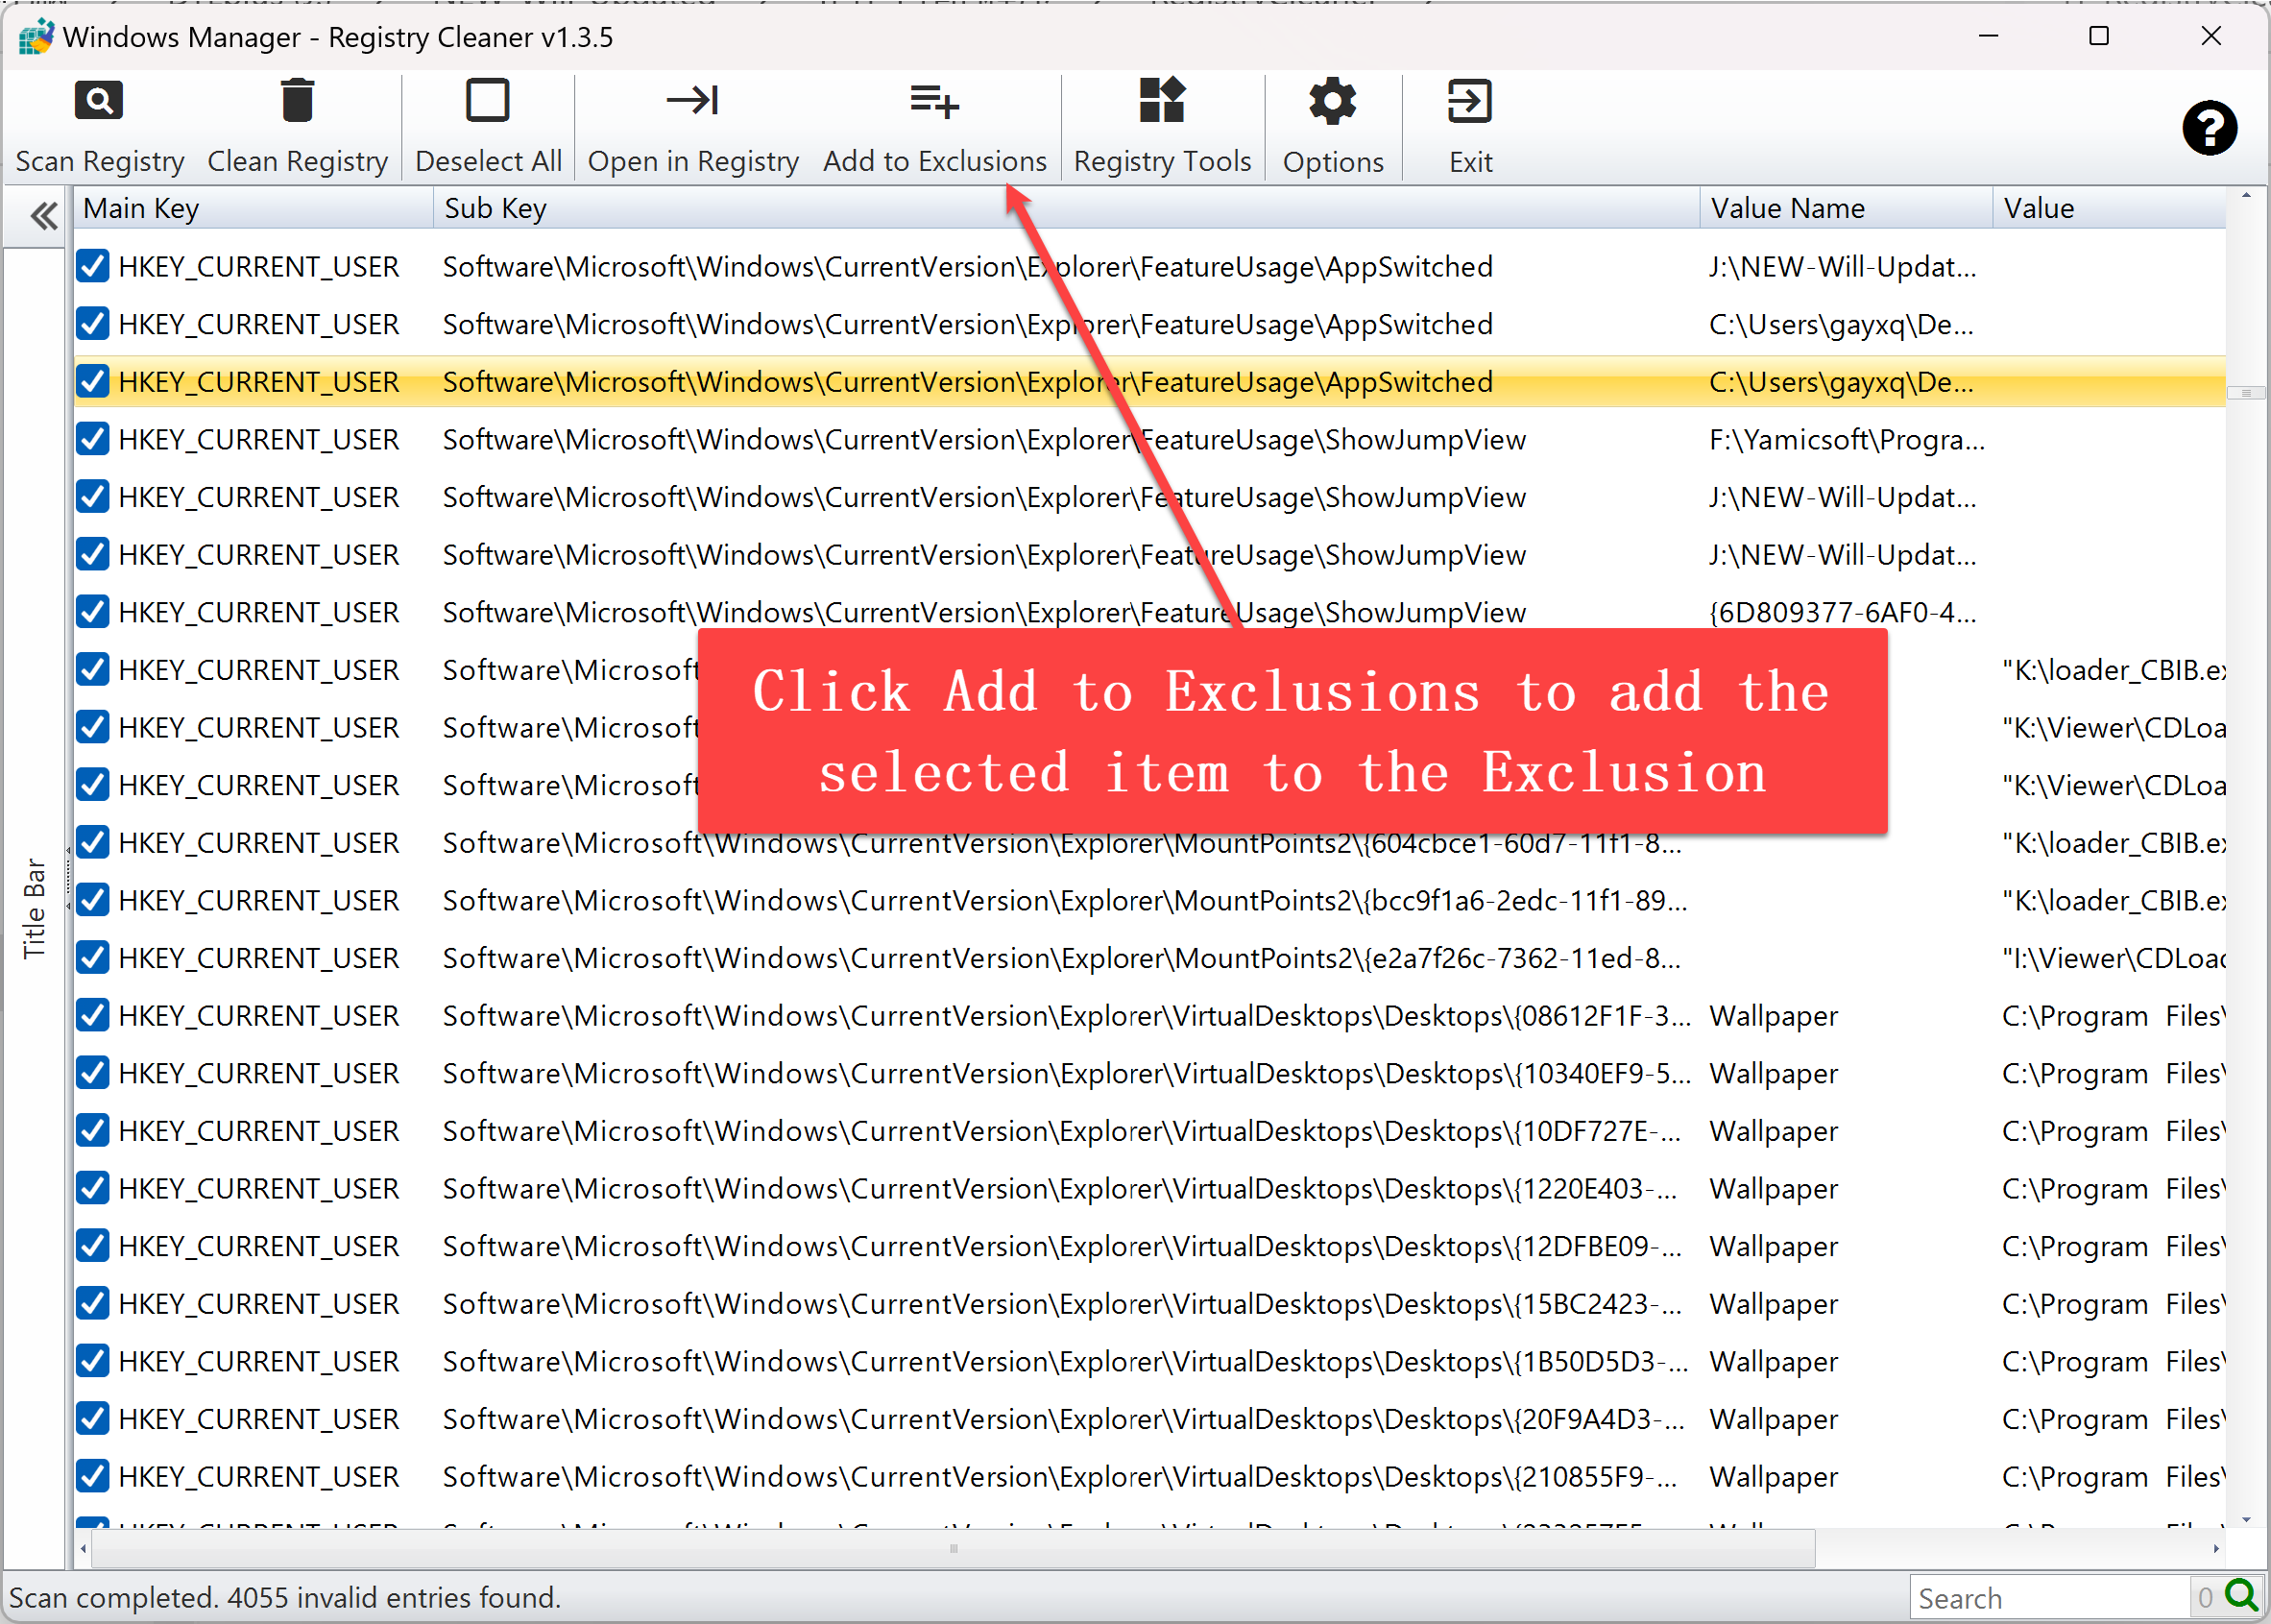
- Top toolbar: Scan Registry, Clean Registry, Select All / Deselect All, Open in Registry, Add to Exclusions, Registry Tools, Options, Exit; ? on the right for a short tip and online help.
- Left expandable panel: Check registry categories to scan; at the bottom, Privacy history in the registry (click to open Privacy Protector).
- Right results list: After scanning—main key, subkey, value name, value, description; items to clean are checked by default.
- Bottom status bar: Current status; search box on the right to filter results.
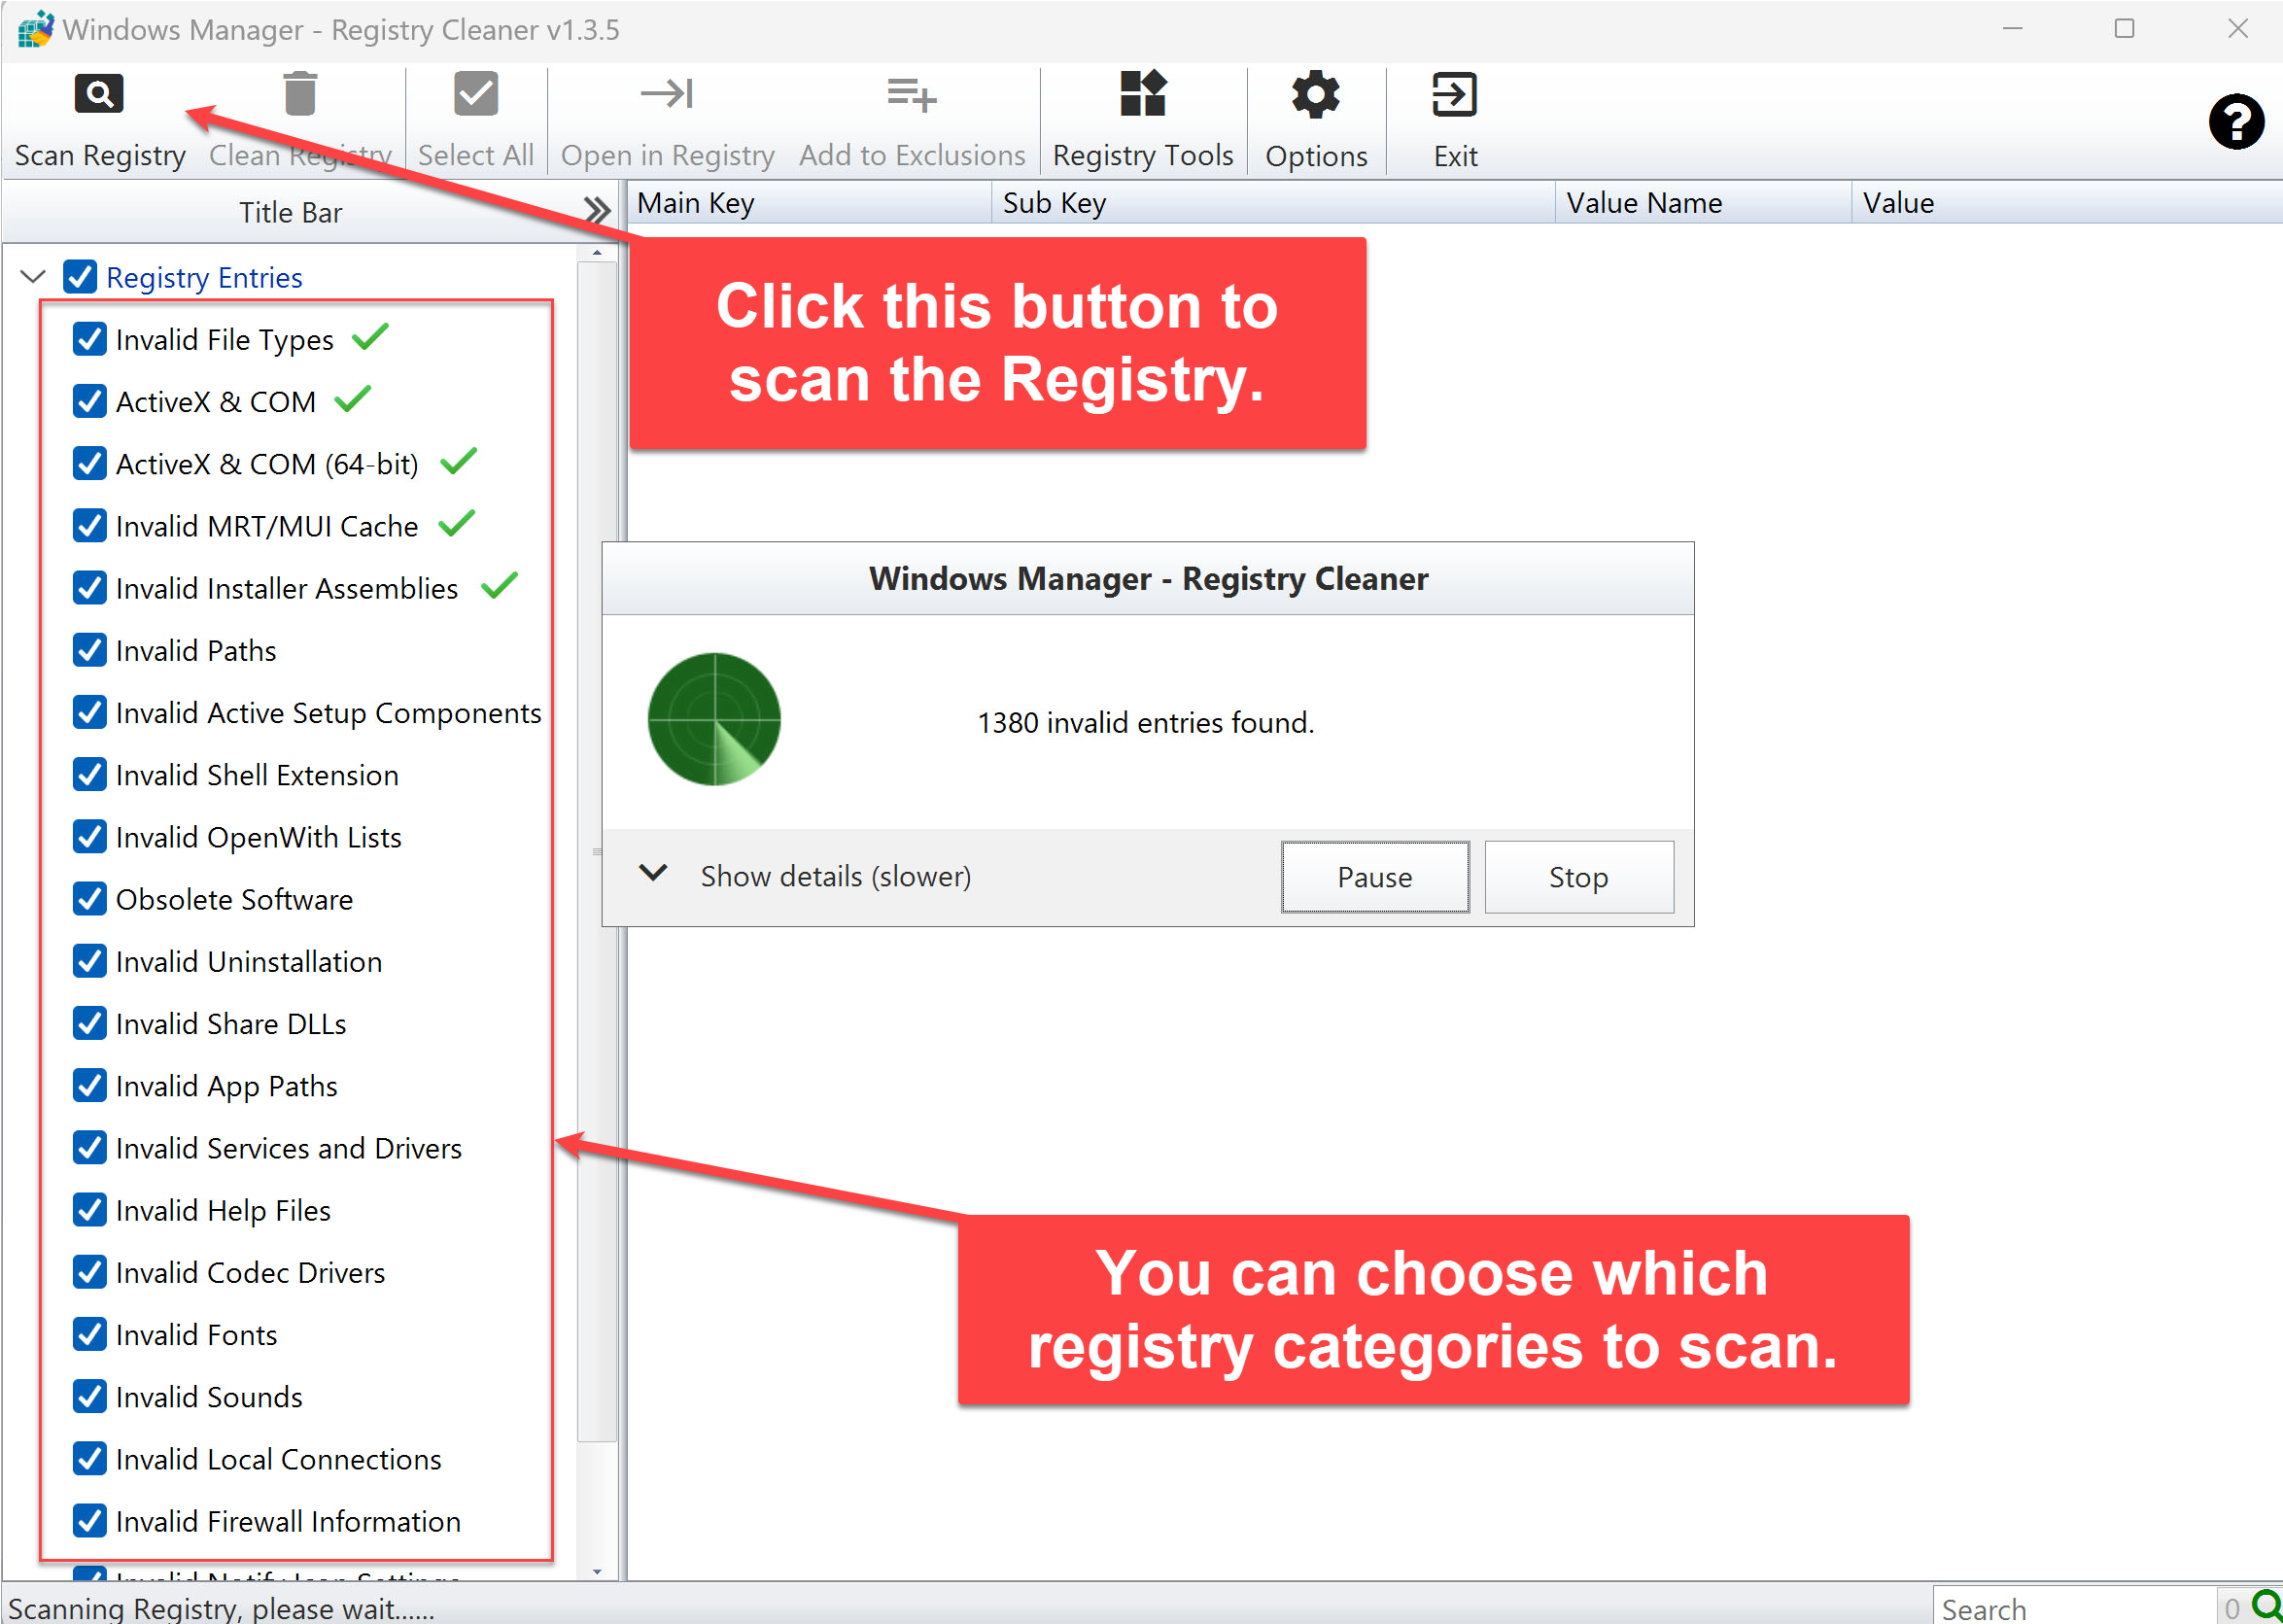
4. Scan categories
Under Registry Entries you can enable many scan types, for example:
- Invalid file types, ActiveX & COM (including 64-bit), invalid MRT/MUI cache, invalid installer assemblies
- Invalid paths, invalid Active Setup components, invalid shell extensions, invalid Open With lists
- Obsolete software, invalid uninstall entries, invalid shared DLLs, invalid App Paths
- Invalid services and drivers, help files, codecs, fonts, sounds
- Invalid local connections, firewall information, notify icon settings, and more
Select at least one category before scanning. Your checkbox choices are remembered for the next launch.
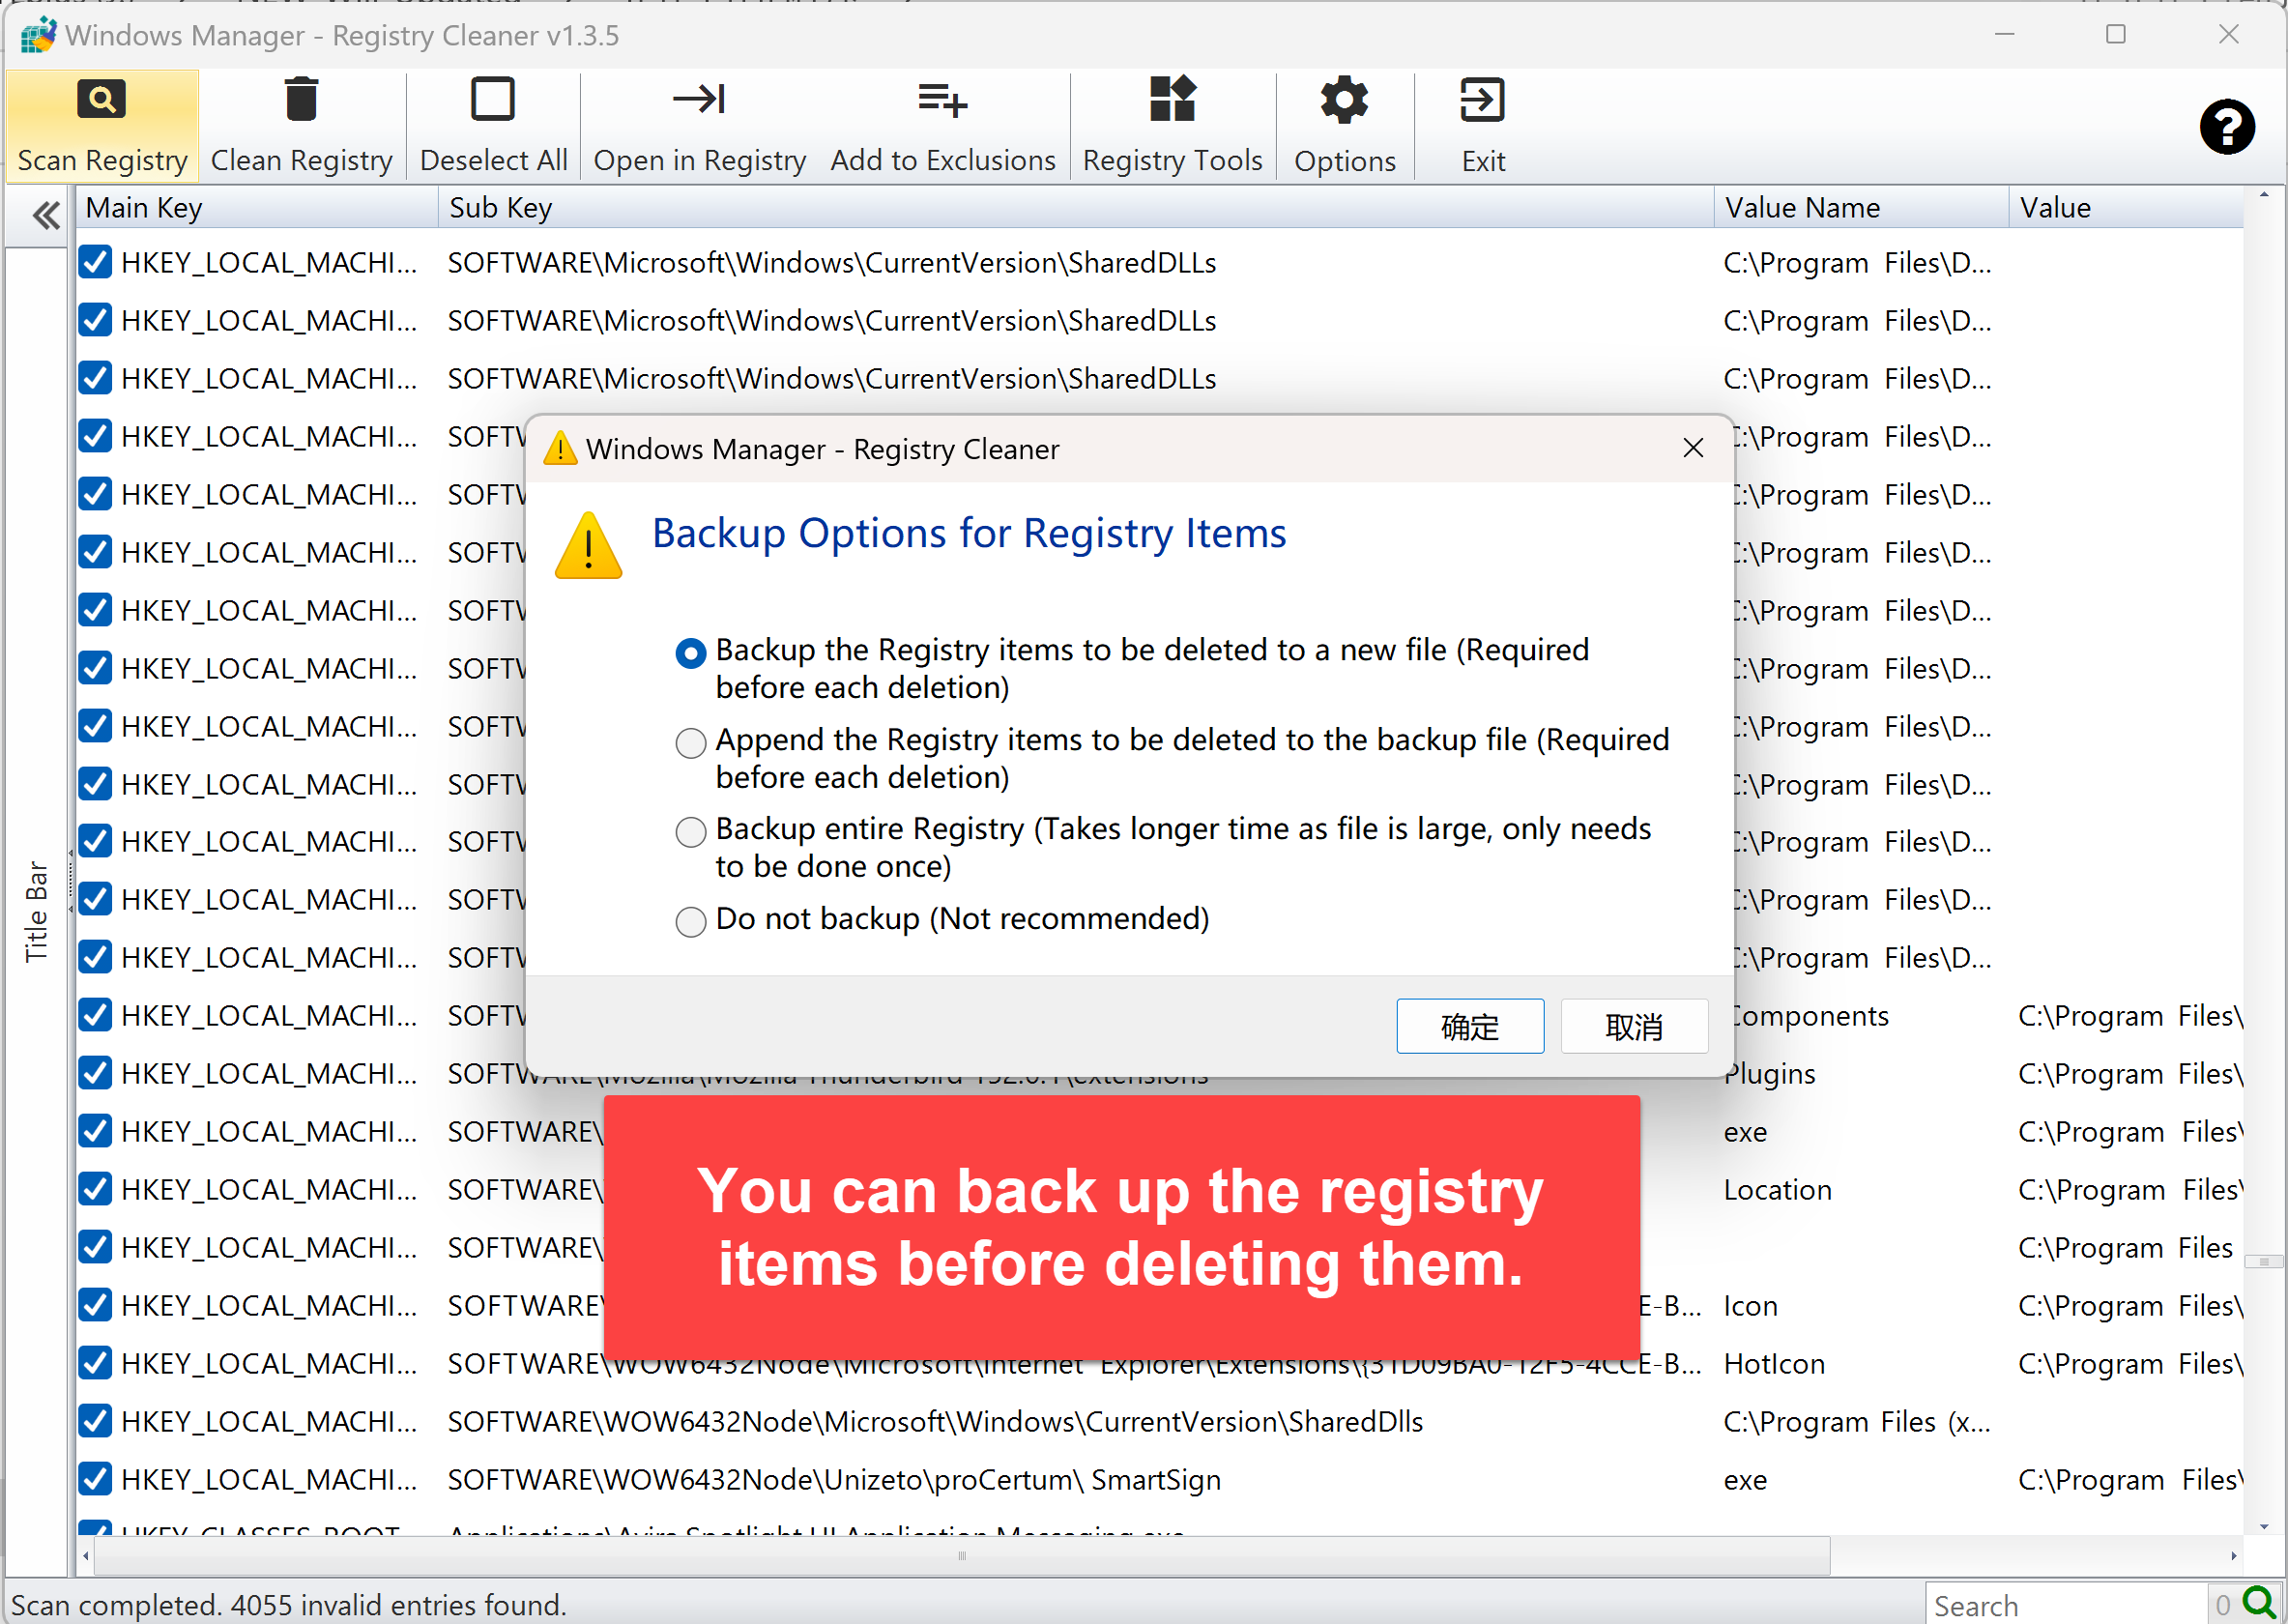
5. Scan and clean workflow
5.1 Scan
- Check categories on the left.
- Click Scan Registry on the toolbar.
- Wait in the scan dialog (pause/resume or stop if needed). Details are hidden by default for speed; enable Show details if you want a live log.
- When finished, results load in the right list; if anything was found, you may be asked whether to start cleaning.
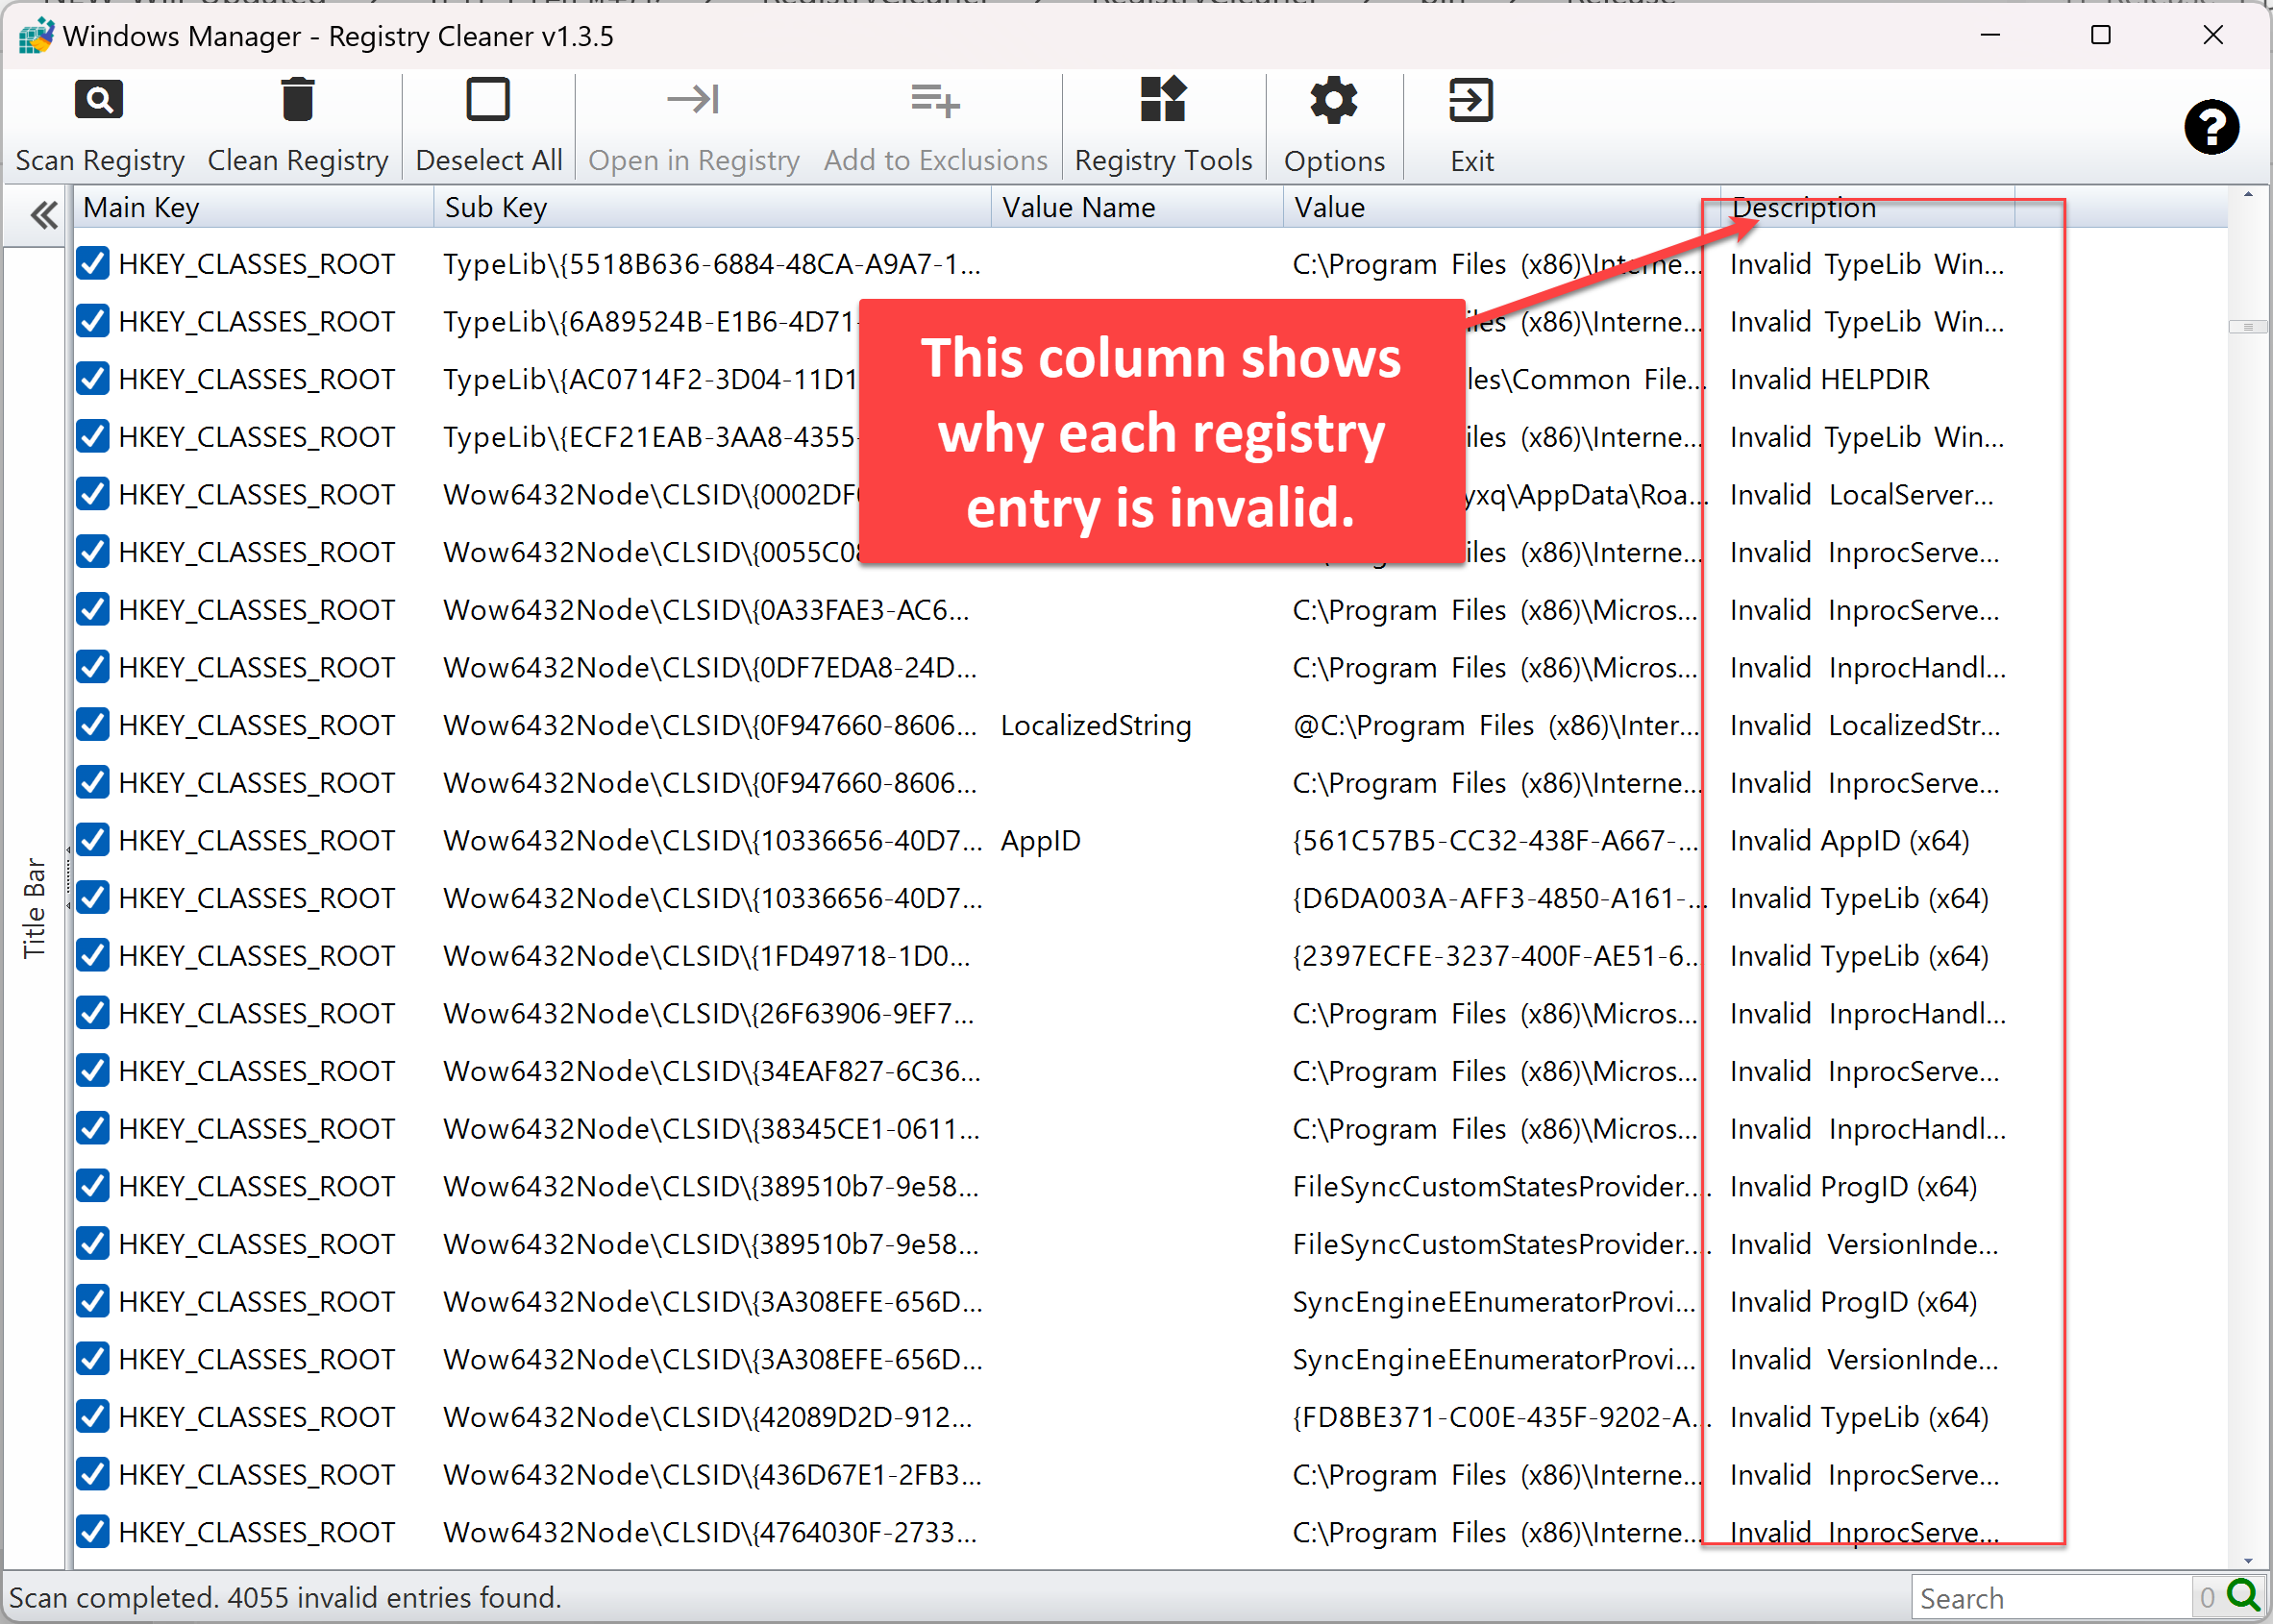
5.2 Clean
- Review checked items in the results list (use the search box if needed).
- Click Clean Registry.
- Choose a backup option (next section), confirm, then deletion runs.
- When done, the status bar reports that selected entries were deleted successfully.
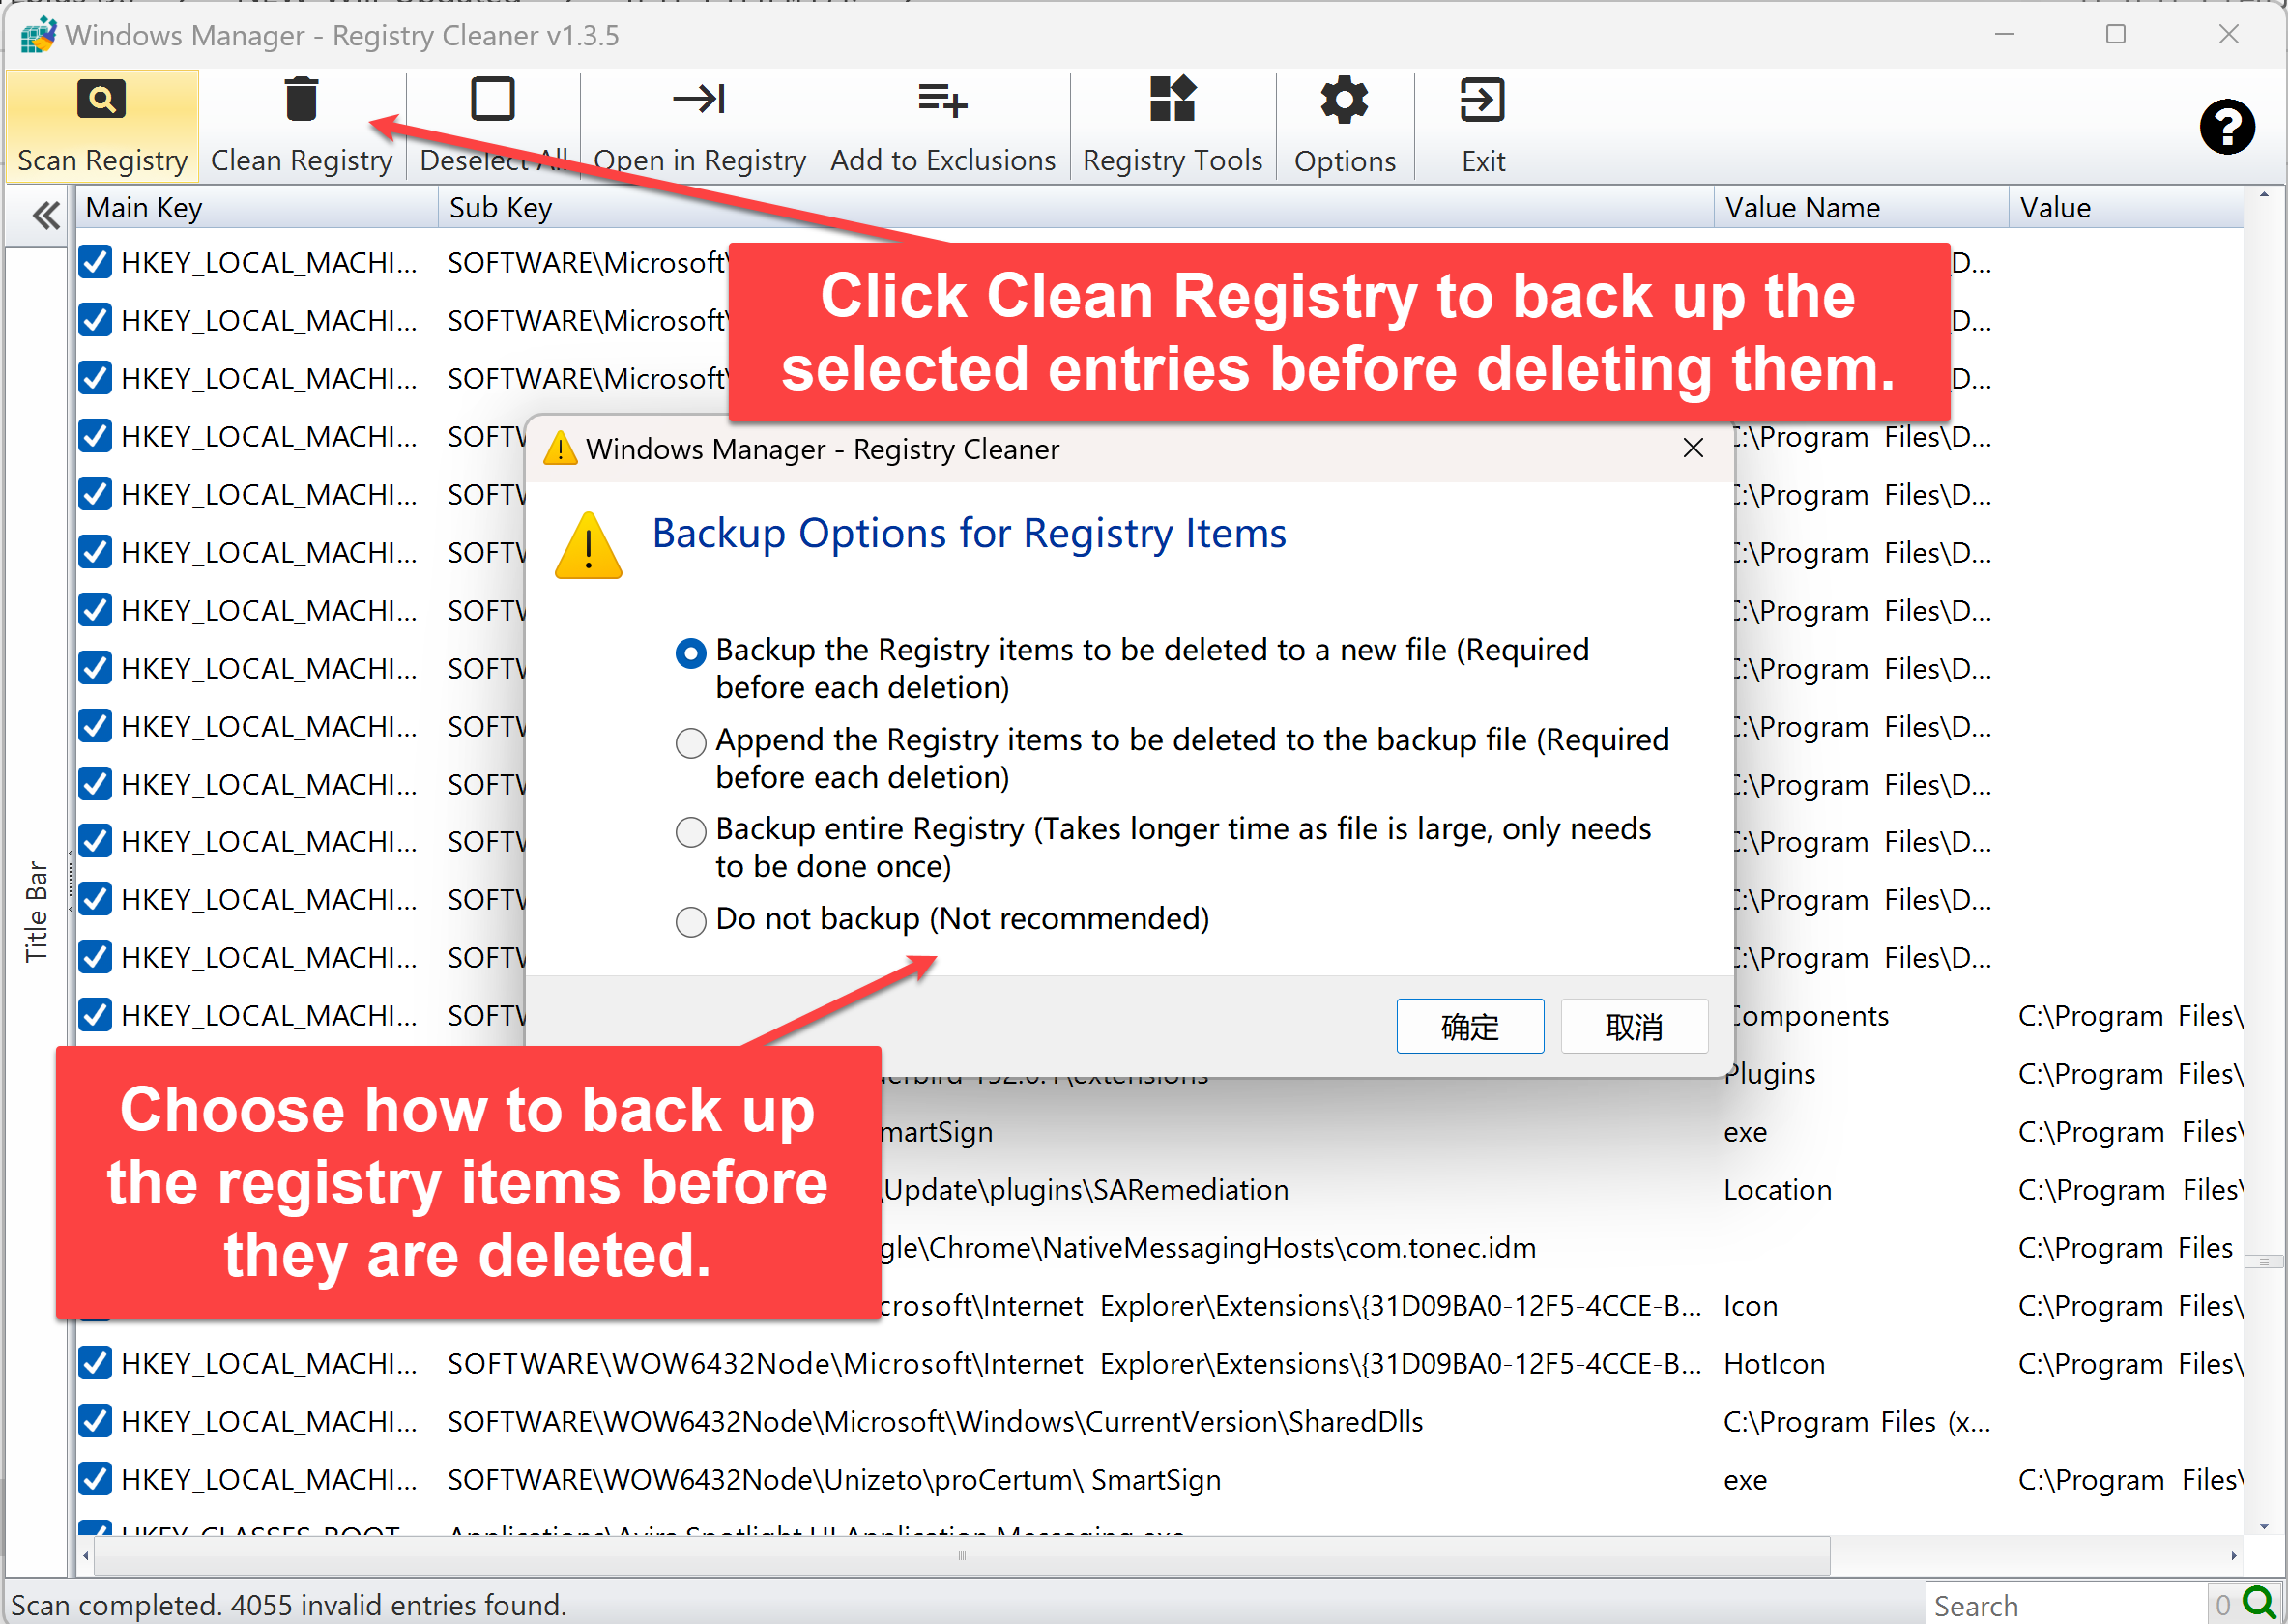
6. Backup options (read before cleaning)
The first clean in a session shows Backup Options for Registry Items with four choices:
- Backup the Registry items to be deleted to a new file (recommended default): exports a new
.regfile before each cleanup. - Append the Registry items to be deleted to the backup file: adds to an existing
.reg. - Backup entire Registry: large file, takes longer; once per session is enough—later cleans skip asking for a full backup again.
- Do not backup (not recommended): deletes immediately—only if you are certain and have other recovery options (e.g. a restore point).
After a successful backup you usually see a short notice, then deletion starts. If export fails, fix permissions or disk path issues—do not skip backup blindly.
7. Review results and exclusions
- Open in Registry: Jump to the selected entry in Registry Editor to see whether it is truly unused.
- Add to Exclusions: Skip a key in future scans; manage the list under Options → Exclusion List.
- Select All / Deselect All: Bulk toggle checks; glance at the Description column (invalid, empty, missing, etc.) before deleting.
- Search: Filter by subkey or value name when the list is long.
Exclusions are stored in this program's settings; invalid key path formats cannot be added.
8. Privacy history and Registry Tools
8.1 Privacy history in the registry
A separate node at the bottom of the left panel. Clicking opens Privacy Protector to clear recent lists, opened folders, launched programs, typed paths, and more—many traces live in the registry and pair well with Registry Cleaner.
8.2 Registry Tools
The toolbar Registry Tools button launches Windows Manager's registry utility suite for backup, editing, or other maintenance (depending on installed components).
9. Important notes
- A second scan may still find items (this is normal). After the first cleanup, relationships between keys change and the scanner may surface another batch of invalid entries that were previously hidden. If a follow-up scan finds more, review and delete again—this is not a program error.
- Back up first. Mistaken deletions can break apps or Windows features. When unsure, exclude the key or inspect it in Registry Editor.
- Do not chase zero entries. The registry is huge; a few leftover invalid keys rarely matter. Repeatedly selecting all and cleaning until nothing remains is slow and risky.
- Close other programs before cleaning when possible, to reduce locks on registry-related resources.
- Run as administrator when needed; otherwise some keys may not scan or delete.
- Trim scan categories if you always exclude one type—uncheck it on the left to save time.
10. Typical workflow
- Cleaner → Registry Cleaner → keep default categories or uncheck a few on the left.
- Click Scan Registry and wait.
- Review results; use Open in Registry on suspicious items; uncheck or Add to Exclusions when unsure.
- Click Clean Registry → choose backup to a new file → wait for completion.
- (Optional) Scan Registry again; if a few new items appear, review and clean once more.
Try it now
Registry Cleaner sits alongside Duplicate Files Finder and Move System Folders in the Windows Manager maintenance toolbox. See the product page for more.
Get started: Download Windows Manager and open Cleaner → Registry Cleaner for your first scan.
