Photos, installers, archives, project backups, sync conflicts—over time, duplicate files pile up. They waste space and make cleanup confusing: which copy should you keep?
Duplicate Files Finder in Windows Manager compares file content using a checksum (MD5), not just filenames. After a scan, duplicates are grouped by the same MD5. Review the default selection, delete checked items, and reclaim space safely.
This guide covers scan scope, the results list, default selection rules, common toolbar actions, and a suggested cleanup workflow.
1. What can Duplicate Files Finder do?
- Find duplicates by content. MD5 hashing groups files even when names differ but content is identical.
- Flexible scan scope. Check one or more drives, or turn on “specified folders only” and add target directories.
- Safer default selection. Results are grouped; by default one file per group stays unchecked (keep), and the rest are checked (delete).
- Restore defaults quickly. After mistakes, use Reset Selection to return to the default strategy.
- Common file actions. Expand/collapse groups, open containing folder, view properties, launch, rename, and delete.
2. How to open Duplicate Files Finder
Open the tool from the Windows Manager main window (category names may vary slightly by version). You will see:
- Left: Drive list—check the partitions to scan.
- Right: Optional specified-folder list and its switch.
- Bottom: Scan results grouped by MD5.
3. Scan scope: drives vs specified folders
3.1 Scan entire drives (default)
On the left, check one or more partitions to scan:
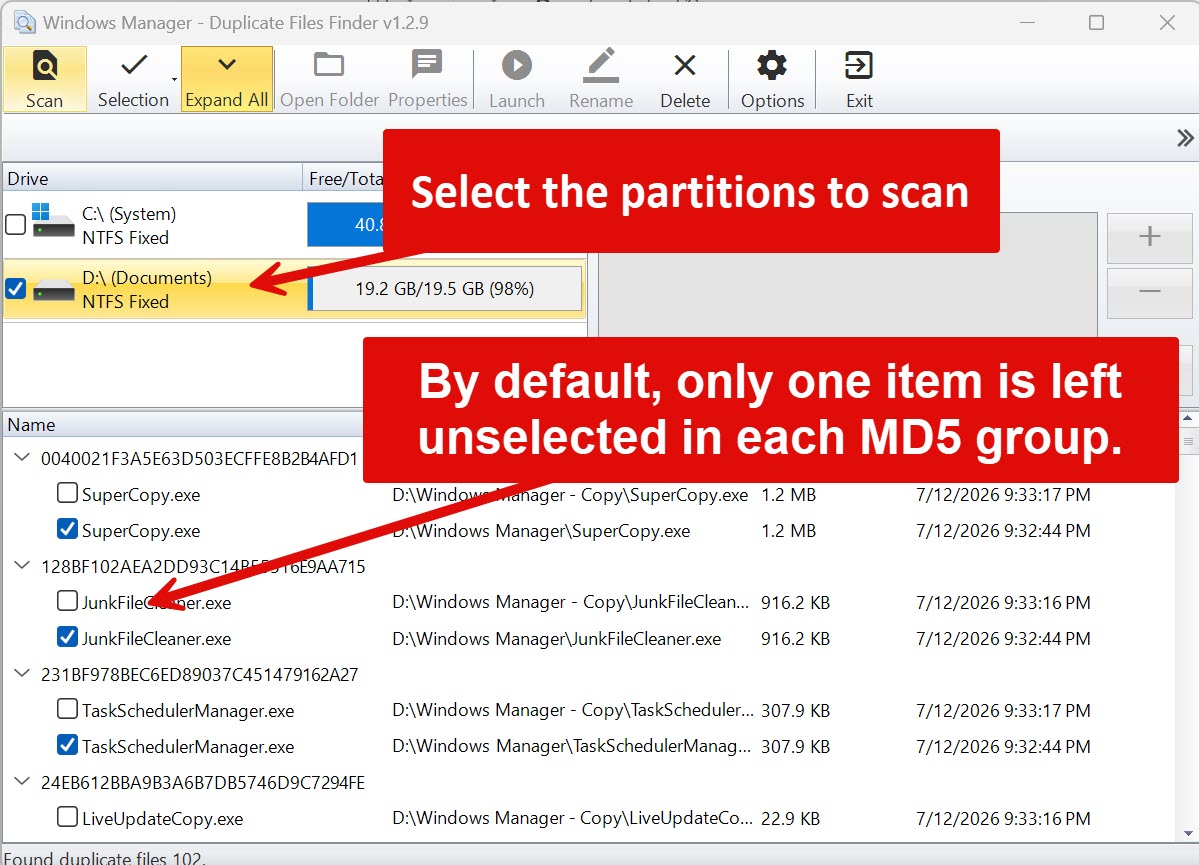
Use this when you want a broad sweep of a drive or a full-drive duplicate check.
3.2 Scan specified folders only
To search only certain folders (photo library, Downloads, software install paths), turn on Find the specified folder(s) on the right:
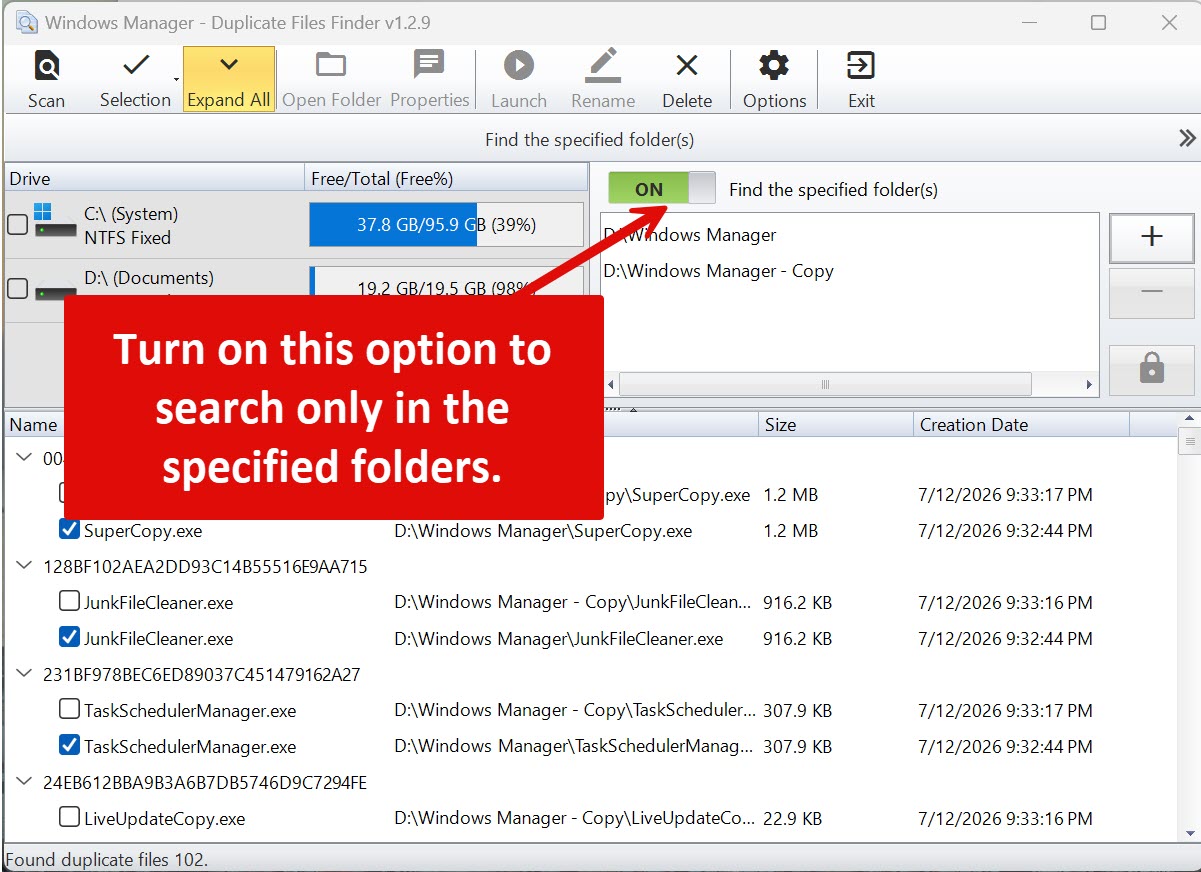
When enabled, the scan includes only folders in the right-hand list—not the whole checked drives on the left. Use + to add folders and - to remove paths you do not need.
4. Start scan and grouped results
After setting scope, click Scan on the toolbar. When finished, results are split into groups with the same content (MD5):
- Parent (group): One duplicate set sharing the same MD5.
- Child (file): Individual files in the group—columns typically include Name, Path, Size, Creation Date, and more.
Use Expand All to open every group at once for review.
5. Selection: default selection and reset
5.1 Default rule: keep one unchecked per group
To reduce accidental deletion, the tool applies a default strategy: one entry per MD5 group stays unchecked (suggested keep), and other duplicates are checked (suggested delete).
Before deleting, review each group: keep the copy with the better path, clearer name, or newer date; leave the rest checked for deletion.
5.2 Reset Selection: restore defaults
If you checked or cleared an entire group by mistake, use Selection → Reset Selection to return to the default strategy:
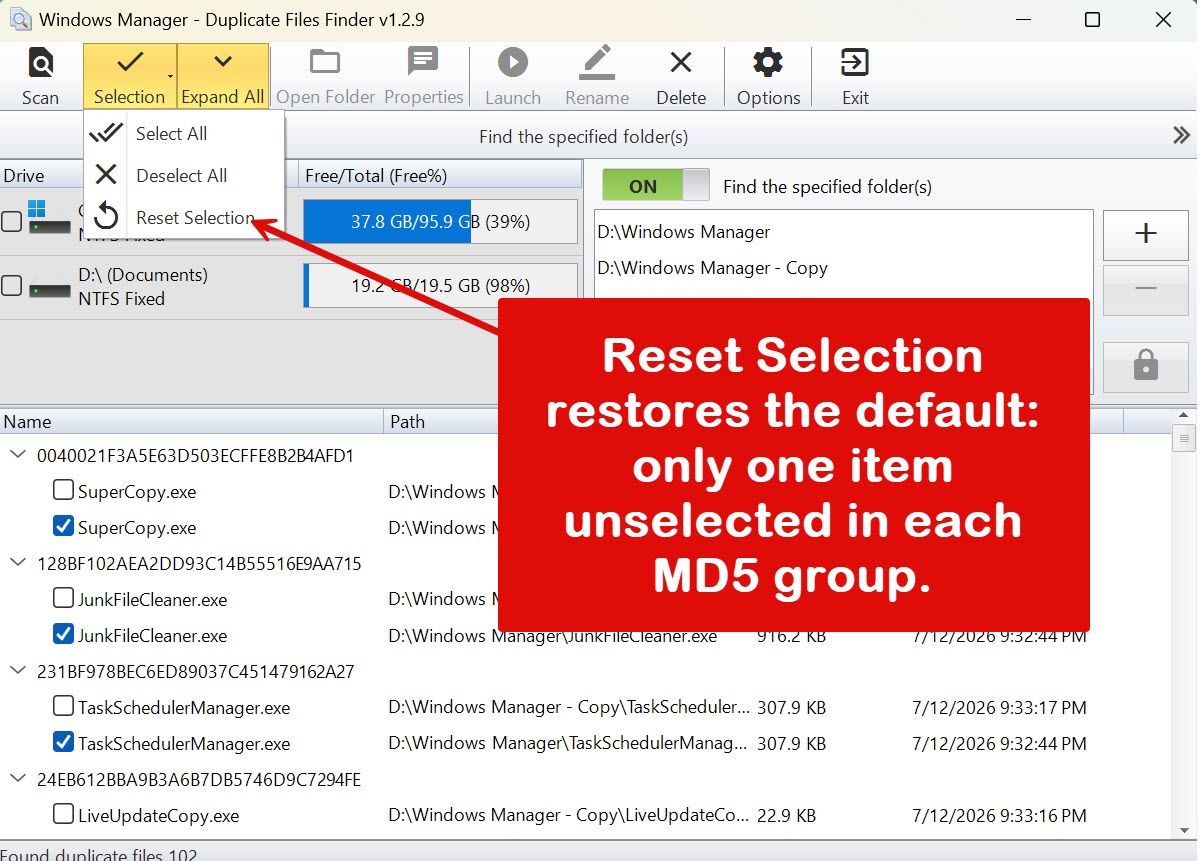
Especially helpful after many manual changes in a large result set—start over without missing a keeper or deleting the wrong file.
6. Common toolbar buttons
Main toolbar actions:
- Scan: Start scanning.
- Selection: Select All, Deselect All, Reset Selection.
- Expand All: Expand or collapse all MD5 groups for review.
- Open Folder: Open the folder containing the selected file.
- Properties: View file properties.
- Launch: Open or run the selected file (useful for executables).
- Rename: Rename the selected file.
- Delete: Delete checked duplicates (review groups and checks first).
- Options: Tool preferences (display details, behavior, and more).
- Exit: Close the window.
7. Important notes
- Start with specified folders. On first use, scan only Photos or Downloads to learn grouping and defaults before a full-drive scan.
- Confirm keepers before delete. Leave at least one unchecked per group; if you changed selections heavily, use Reset Selection and review from scratch.
- Be careful with system locations. Avoid aggressive deletes under Windows or Program Files; if you must scan there, delete only duplicate data files you can identify.
- Watch paths. Same-named files may sit in version folders or backups—keep the copy you are actually using.
8. Typical workflows
Clean duplicates in a few folders (recommended)
- Turn on Find the specified folder(s).
- Use + on the right to add folders (e.g. Photos, Downloads, backups).
- Click Scan.
- Click Expand All.
- Review each group: keep one unchecked, leave the rest checked.
- If needed, use Selection → Reset Selection.
- Click Delete to remove checked items and free space.
Full-drive scan
- Turn off Find the specified folder(s) (scan by drive).
- Check the drives to scan on the left.
- Scan → expand → review groups → delete checked items.
Try it now
Duplicate Files Finder helps when space is tight or files need organizing: find duplicate content first, then use other Windows Manager tools for broader cleanup. See the product page for more.
Get started: Download Windows Manager, open Duplicate Files Finder, and run your first scan.
